📢 Revive Your Savings! 20% OFF Everything! Use code: 🔥CRAFTAXE🔥at checkout 🛍️..

How to Enable SFTP for Windows VPS: Ultimate Guide
Setting up SFTP (Secure File Transfer Protocol) on a Windows VPS is essential if you want to securely transfer files between your local machine and your server. SFTP encrypts both commands and data, making it a more secure alternative to FTP (File Transfer Protocol), which transmits data in plain text. While SFTP is natively supported on Linux, enabling it on a Windows VPS requires some additional steps. In this detailed guide, we will walk you through every step to successfully enable SFTP on your Windows VPS.
Requirements
Before diving into the process, ensure that you have the following:
- Windows VPS: A VPS running a version of Windows, such as Windows Server 2016, 2019, or 2022.
- Administrator Access: You will need administrative privileges to install and configure the necessary components.
- An SFTP Client: Software such as FileZilla or WinSCP to connect to the server once SFTP is enabled.
Steps To Install SFTP For Windows
Step 1: Install SFTP Server
SFTP is also known as OpenSSH. The easiest way to enable SFTP on a Windows VPS is by installing OpenSSH. OpenSSH is a free and open-source version of the Secure Shell (SSH) protocol, which includes SFTP.
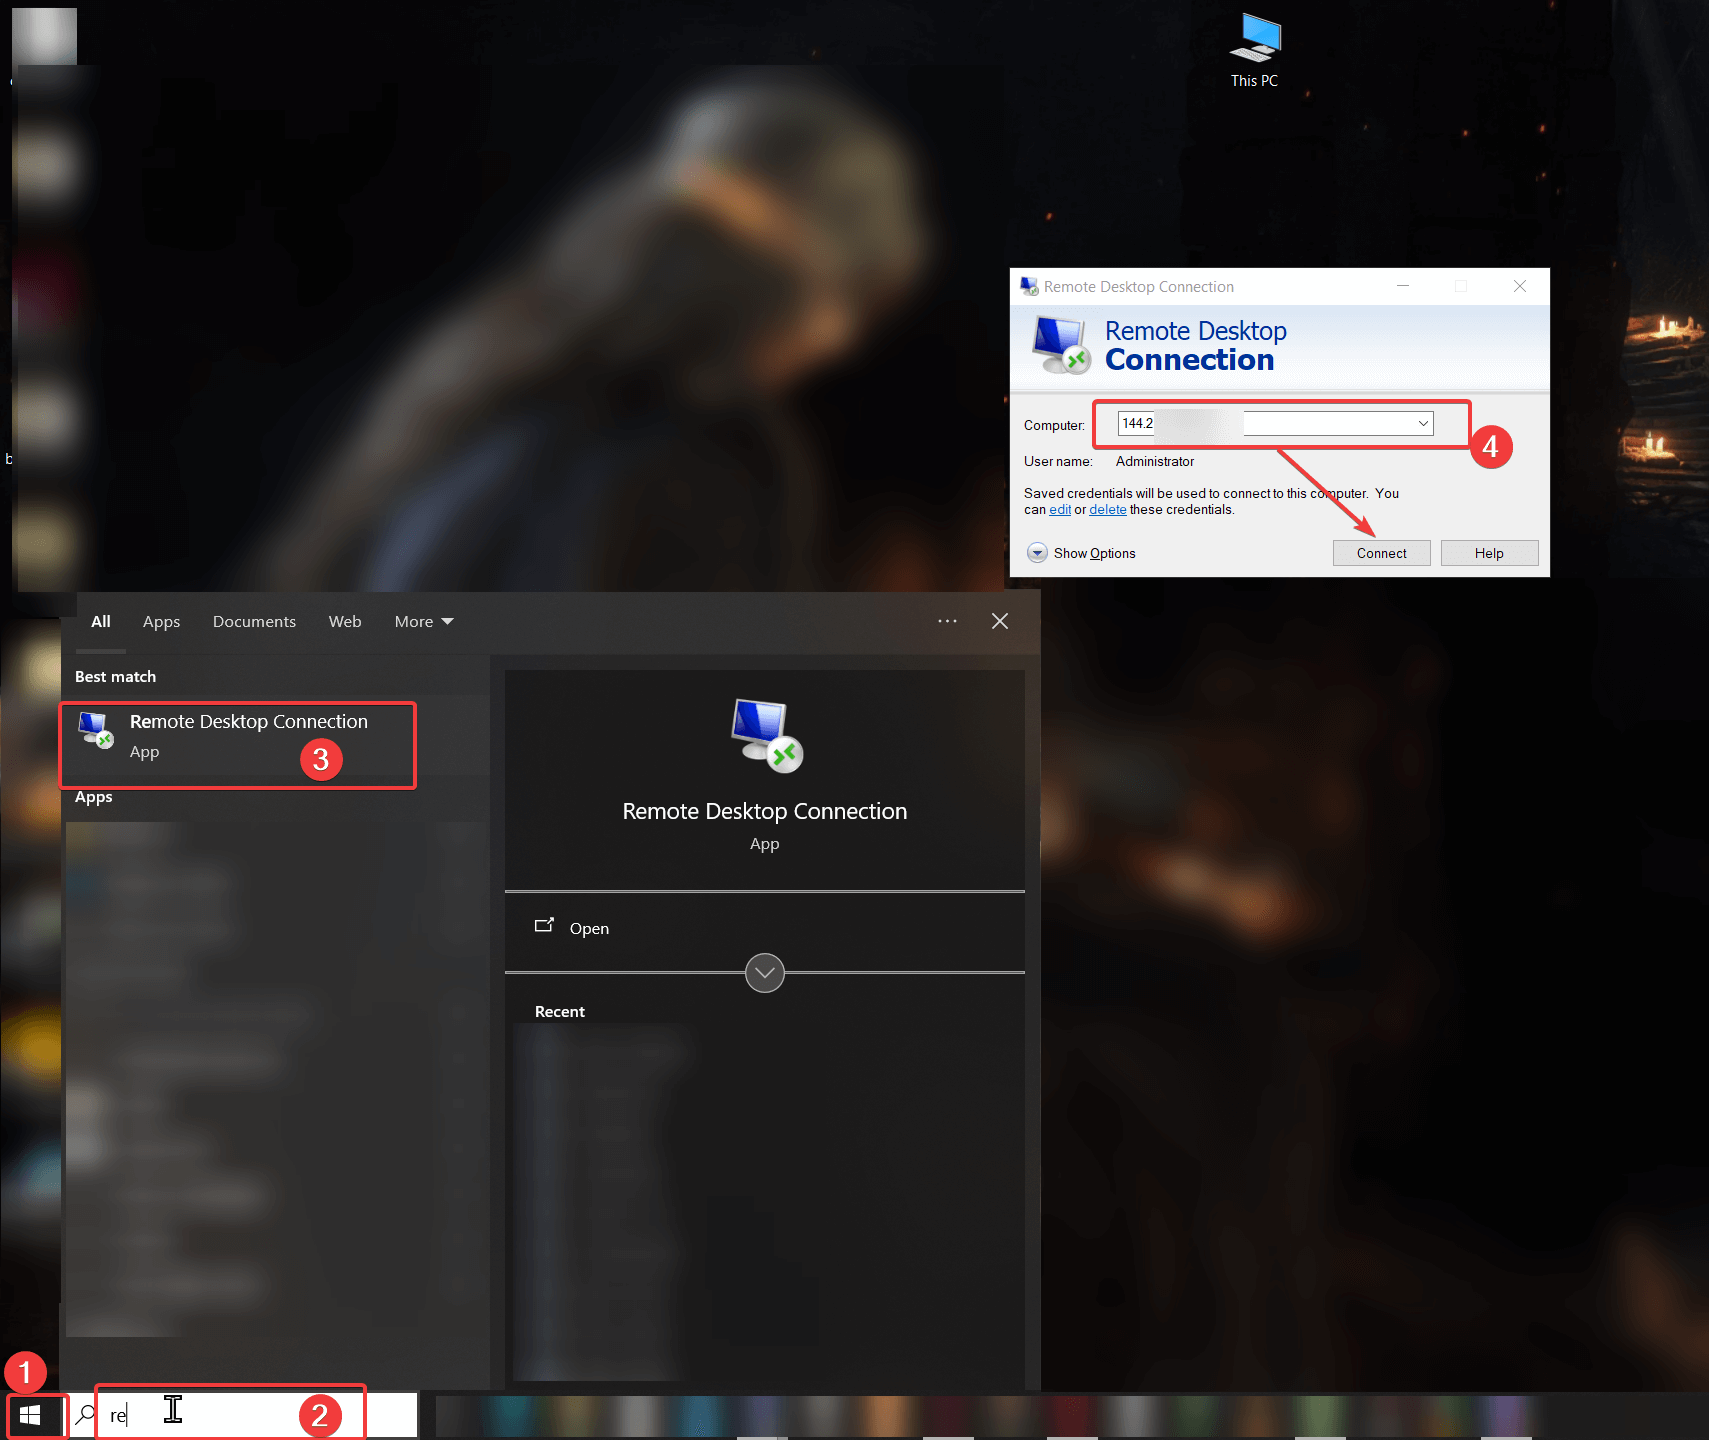
- Log in to your Windows VPS: Use Remote Desktop to log in with your administrator credentials.
- Open Windows Settings:
- Click on the Start button and go to Settings.

- Navigate to Apps → Optional Features.
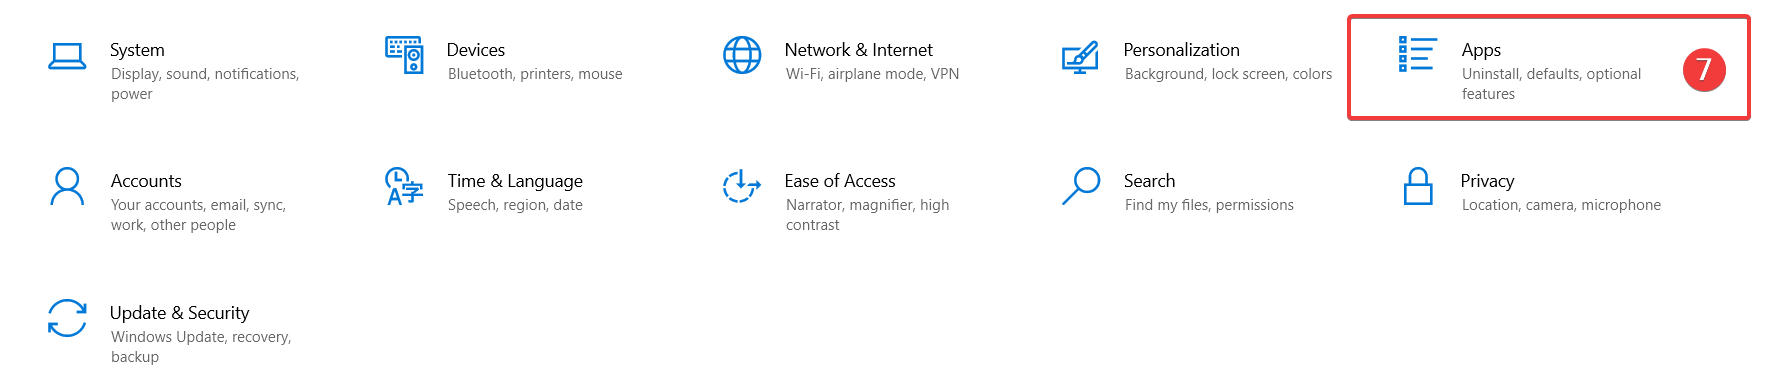
- Click on the Start button and go to Settings.
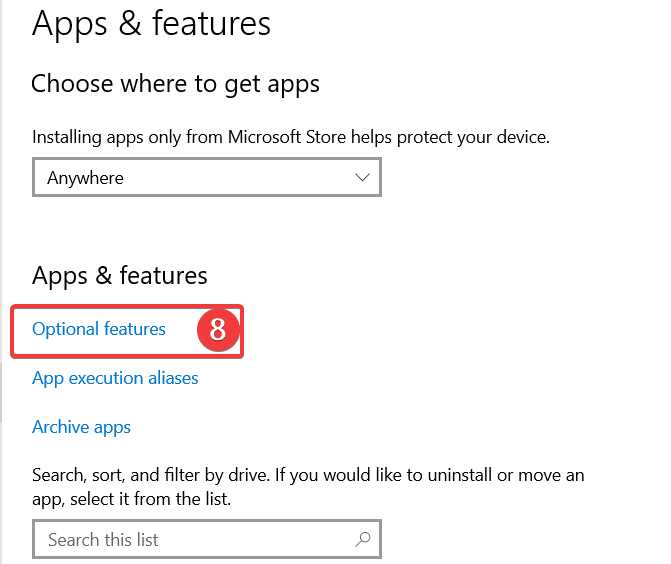
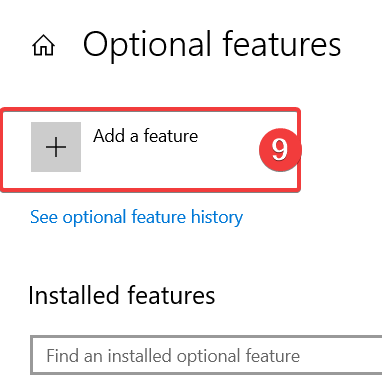
- Add a Feature:
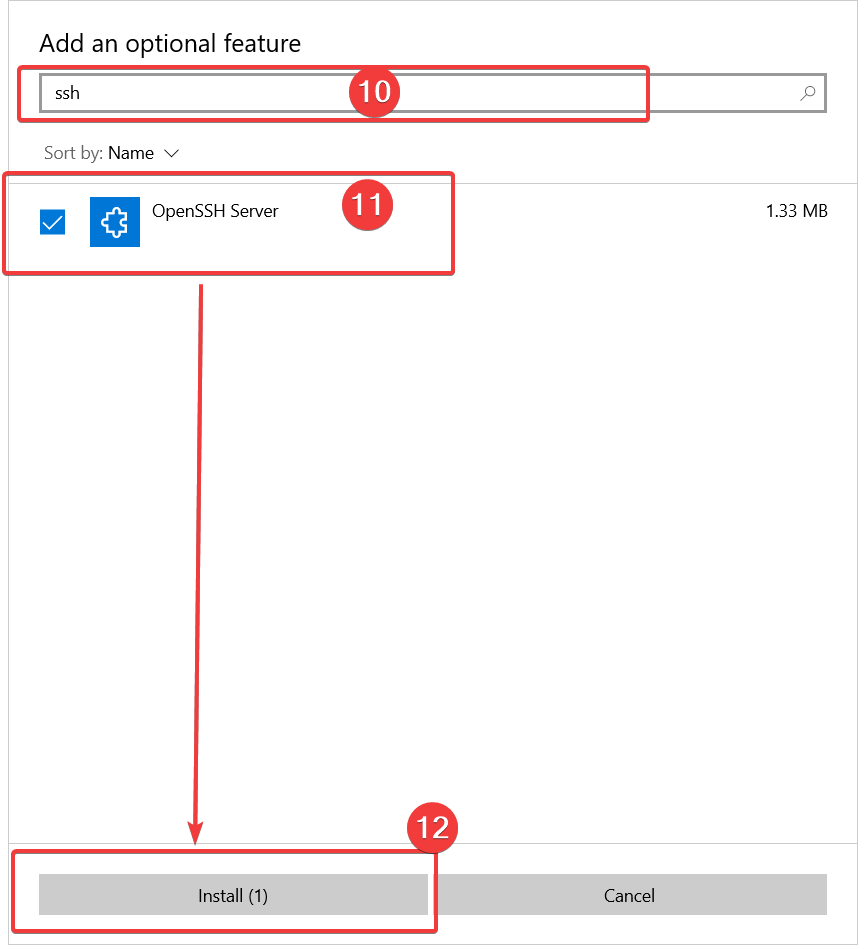
- In the Optional Features section, scroll down and click Add a feature.
- Search for OpenSSH Server in the list, select it, and then click Install.
Step 2: Start and Enable OpenSSH Service
Now that OpenSSH is installed, you need to start the OpenSSH Server service and ensure it starts automatically every time the VPS reboots.
- Open Services:
- Press Win + R, type services.msc, and hit Enter.
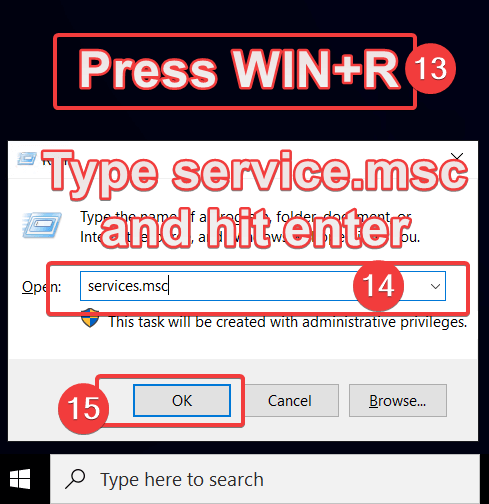
- In the Services window, look for OpenSSH Authentication Agent and OpenSSH Server.

- Press Win + R, type services.msc, and hit Enter.
- Start the Service:
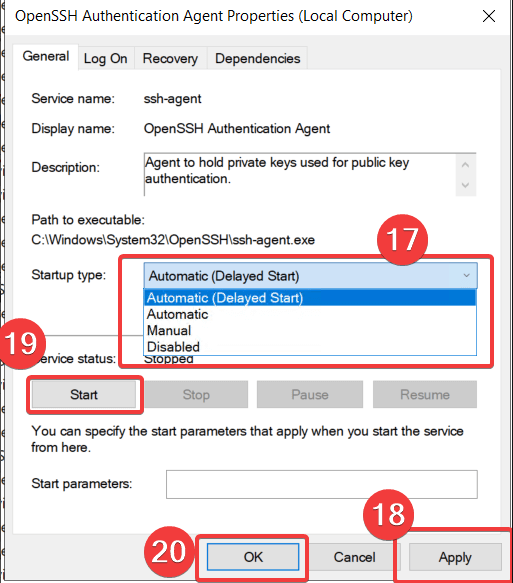
- Right-click on OpenSSH SSH Server and select Start.
- Set the Service to Start Automatically:
- Right-click on OpenSSH SSH Server again, choose Properties and set the Startup type to Automatic.
- Click Apply then start and OK to save the settings.
Step 3: Configure Firewall Rules
By default, Windows Firewall may block the SSH/SFTP port (which is port 22). You need to allow this port for SFTP to work properly.
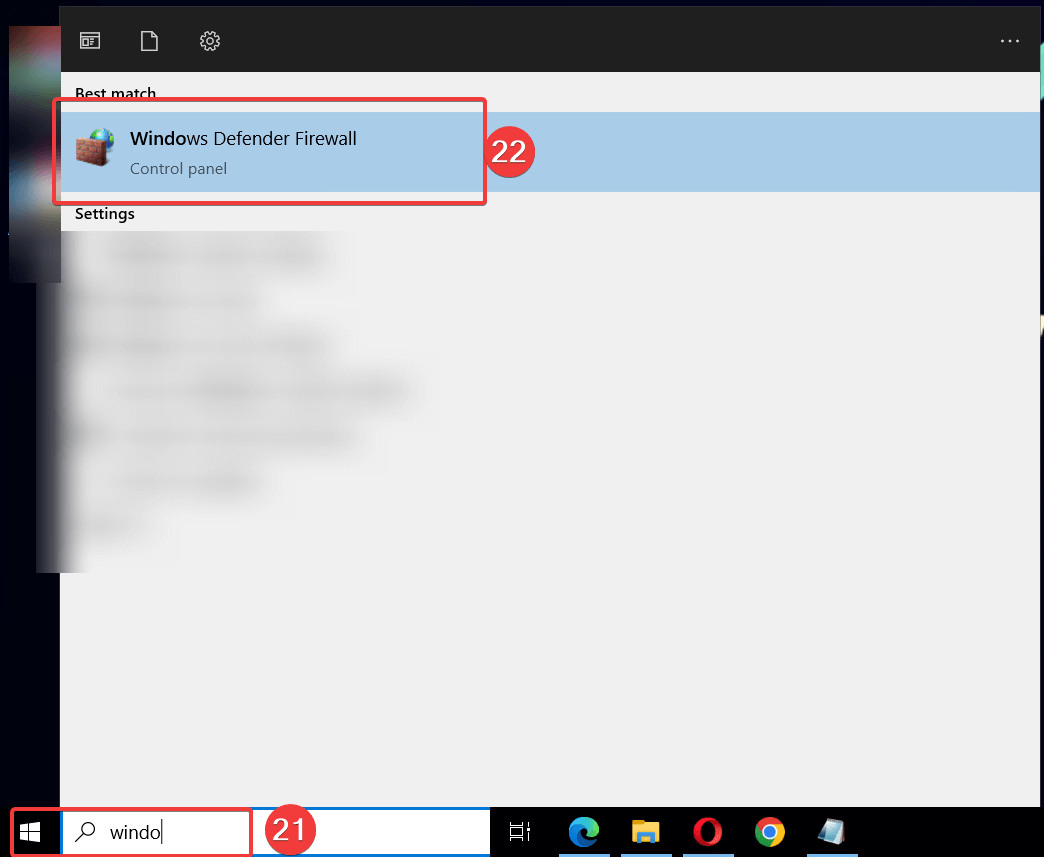
- Open Windows Defender Firewall:
- Go to the Control Panel → System and Security → Windows Defender Firewall or Search it.
- On the left, click Advanced Settings.
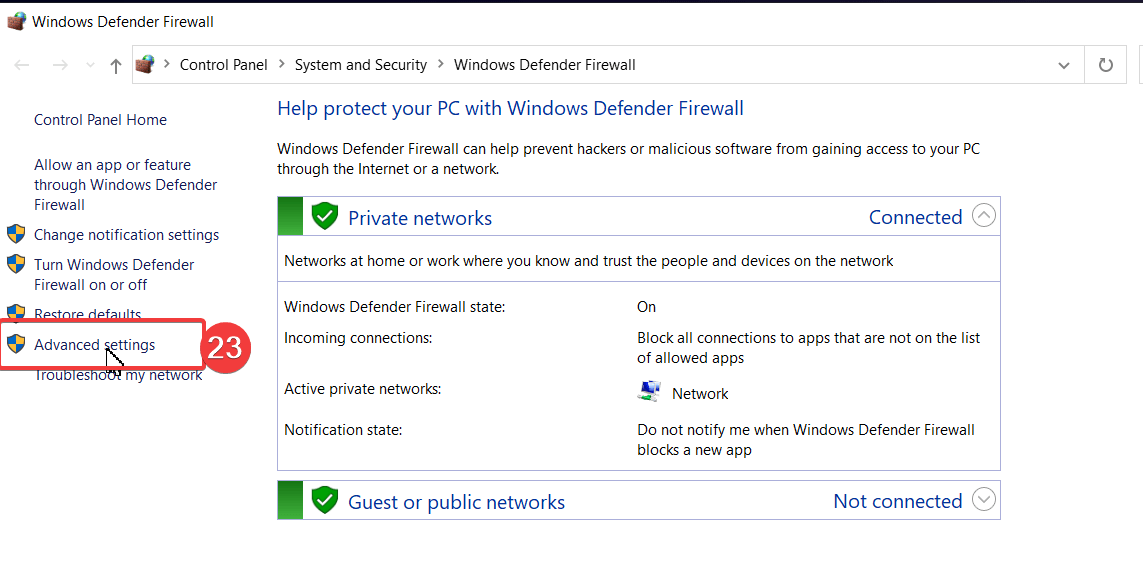
- Go to the Control Panel → System and Security → Windows Defender Firewall or Search it.
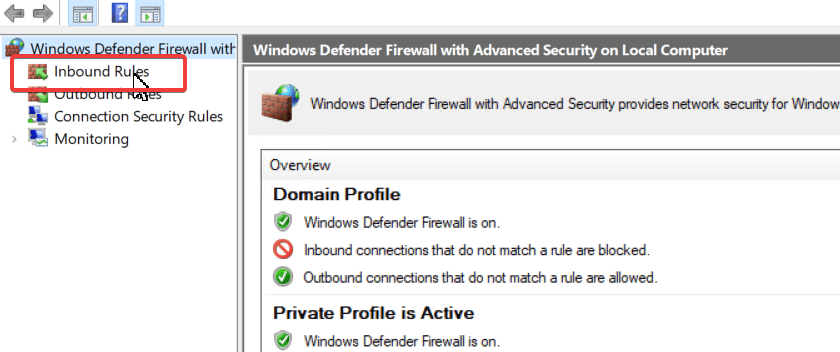
- Create a New Inbound Rule:
- In the Advanced Security window, right-click on Inbound Rules and select New Rule.

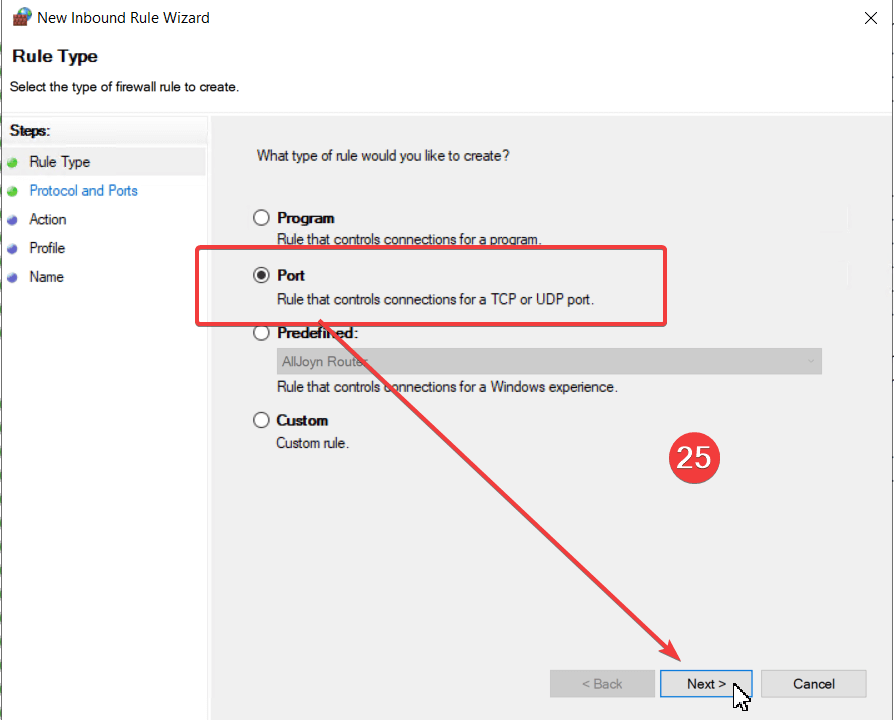
- Choose Port and click Next.
- In the Advanced Security window, right-click on Inbound Rules and select New Rule.
- Specify the Port:
- Select TCP and in the Specific local ports field, type 22. Click Next.
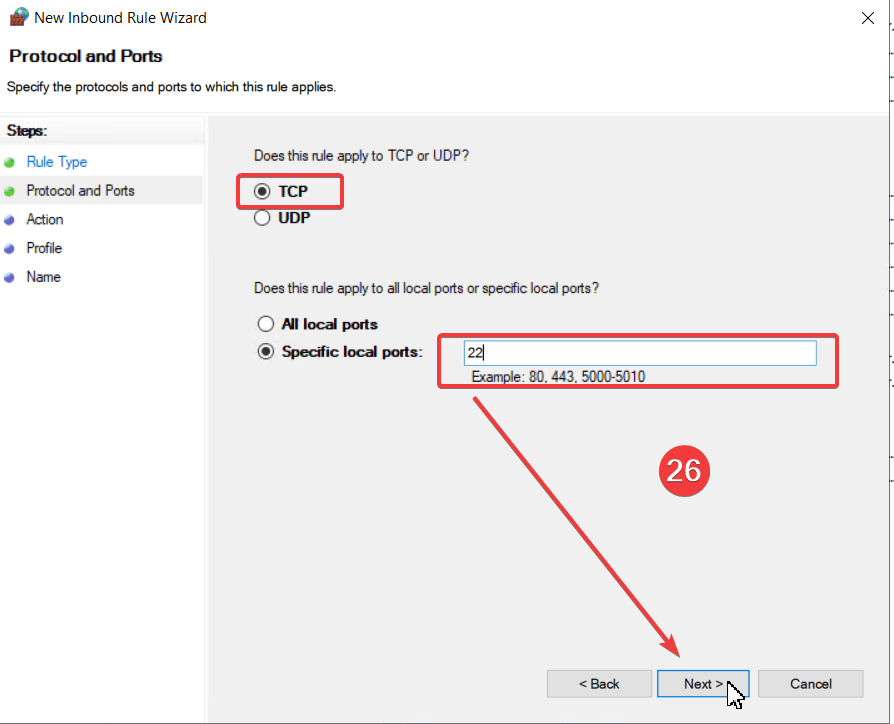
- Select TCP and in the Specific local ports field, type 22. Click Next.
- Allow the Connection:
- Select Allow the connection and click Next.
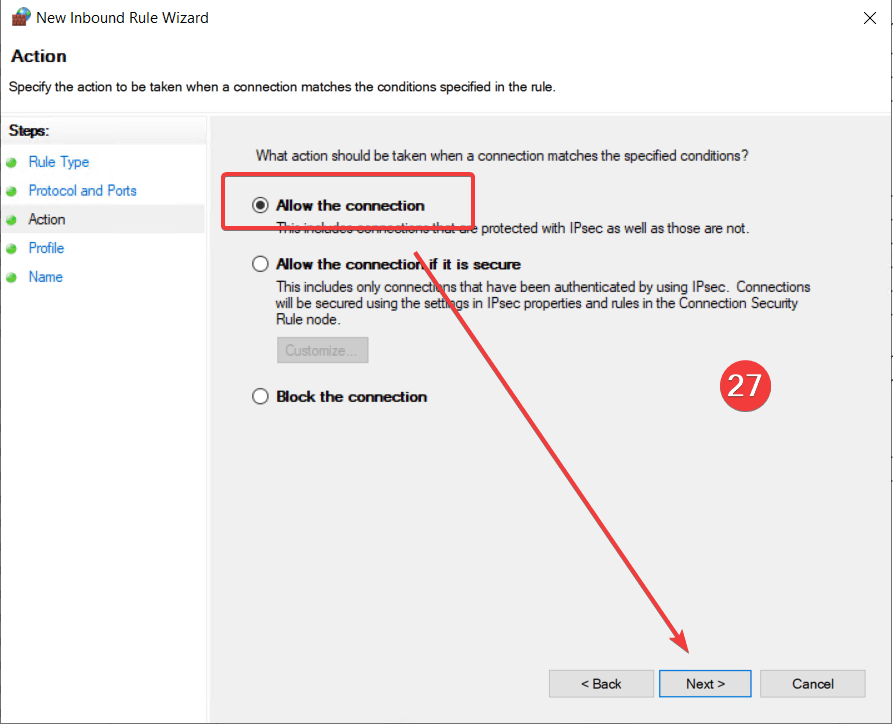
- Select Allow the connection and click Next.
- Apply the Rule:
- Choose when the rule applies (domain, private, public), then click Next.

- Give the rule a name, such as SFTP Port 22 , and click Finish.
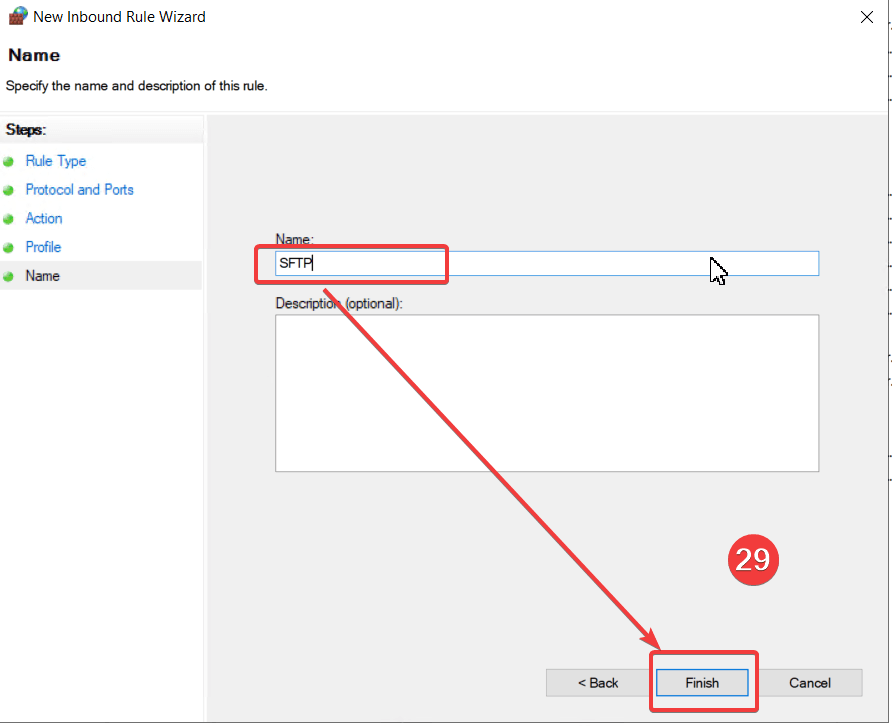
- Choose when the rule applies (domain, private, public), then click Next.
Step 4: Test the SFTP Connection
Once everything is configured, it's time to test your SFTP setup to ensure it's working correctly.
- Install an SFTP Client: Download and install a popular SFTP client like FileZilla or WinSCP.
- Set Up a Connection:
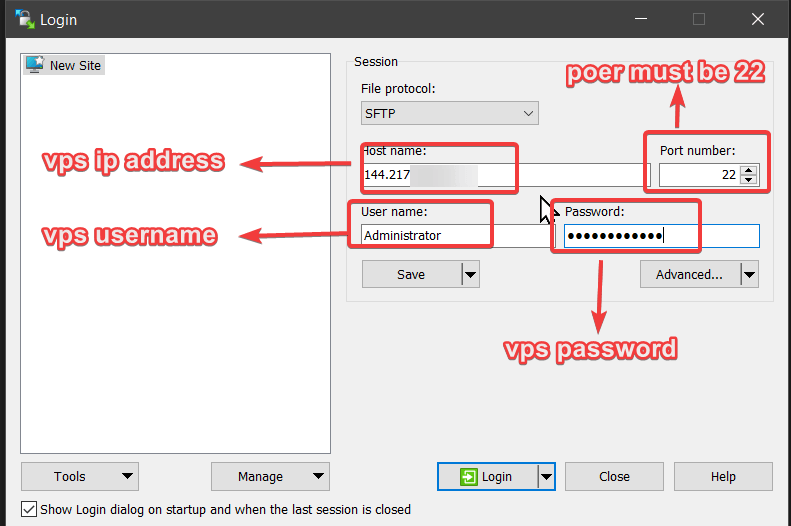
- Open the SFTP client and create a new connection using the following details:
- Host: The IP address or domain of your VPS.
- Port: 22.
- Protocol: SFTP.
- Username: The username you created (e.g., administrator).
- Password: The password you set for the user (e.g., VPSpassword).
- Test the Connection:
- Click Connect. If everything was set up correctly, you should now be connected to your Windows VPS via SFTP, and you can start securely transferring files..

- Click Connect. If everything was set up correctly, you should now be connected to your Windows VPS via SFTP, and you can start securely transferring files..
Conclusion
Enabling SFTP on a Windows VPS may seem challenging, but by following the above steps, you can quickly set up a secure environment for transferring files between your local system and your VPS. With SFTP in place, your data is encrypted, offering better protection against unauthorized access. Remember to take additional security measures, such as using SSH key-based authentication, to further safeguard your server.
Now, you’re ready to start securely managing your files on your Windows VPS using SFTP! If you're looking for reliable VPS hosting solutions, consider checking out Revive Hosting for top-notch services to support your needs.
Build Your Server With Revive Hosting
From professional business to enterprise, we’ve got you covered!

Contact Us
Address
- 30 N Gould St Ste R Sheridan, WY 82801
- Join Our Discord
- +1 646 777 5109
- [email protected]
-

-

- Copyright 2023-2025 Revive Hosting All Rights Reserved